How to Remove Drums from a Sample (and Keep the Melody)
You've found the piano loop. The chords are right, the texture is right, and there's a snare sitting exactly where you don't want it. Add your own clap and now you have two backbeats arguing.
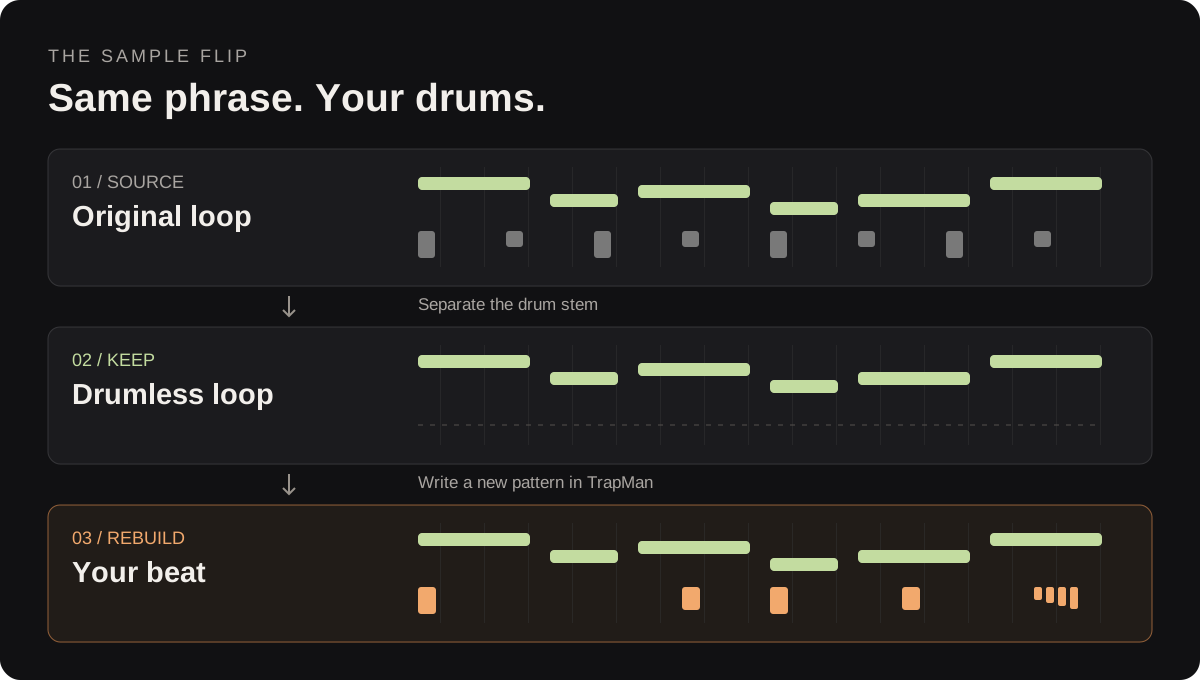
To remove drums from a sample, separate the drum stem and keep the remaining music. Then check what the separation took with it. A quieter snare isn't much help if the piano has lost its attack.
Why EQ only gets you so far
The kick overlaps the bass. The snare overlaps the piano, guitar and vocal. An EQ cuts frequencies shared by all of them; it doesn't know which instrument you meant.
That's the frustration in this sampling discussion: producers can push the original drums back, but getting rid of them without damaging the sample is another job. Older tutorials, including TCustomz's drum-removal tips, explore chopping and shaping the sample around those hits.
Those tricks still have a place. First, listen for a drum-free intro or breakdown containing the same phrase. If it exists, use it. If the phrase only happens under the drums, try separation.
Separate it, then listen to both files
Neural Analog's drum remover accepts an uploaded file and produces an isolated drum stem plus a version without drums. Here's a useful way to work:
- Upload the source. Use the best file you have. Choose a phrase with enough room around it to hear the note endings; make the final chop after you've checked the separation.
- Run drum removal. Preview the drumless result. Listen through the snare hits and cymbal tails, where damage can be easy to miss on a quick first pass.
- Check the isolated drums too. A piano note or bass phrase clearly audible there is a clue that some of the music got pulled into the wrong stem.
- Download the drumless version. Bring it into your DAW and keep the original muted on a reference track. Compare at similar loudness.
Don't play the original mix underneath the drumless file. That brings the old drums straight back.
What if you can still hear the snare?
Some bleed can remain, especially in dense mixes. Judge the result with your replacement drums playing, then solo the sample to check the exposed sections.
- A faint hit disappears under your clap: it may already be usable. Listen again during fills and drum dropouts.
- A cymbal tail turns watery: try another separation model or another part of the source. More treble reduction can make the melody dull before it fixes the tail.
- A chop clicks at the edge: add a short fade. This fixes the edit boundary, not the stem separation.
If the cleanest version sounds worse than the original, keep a little of the old rhythm and arrange around it. Total silence between instruments isn't the measure of a good sample flip.
Put your own drums in the space
Loop two or four bars and check the sample against the DAW grid before programming. If its timing drifts, chop or warp it first.
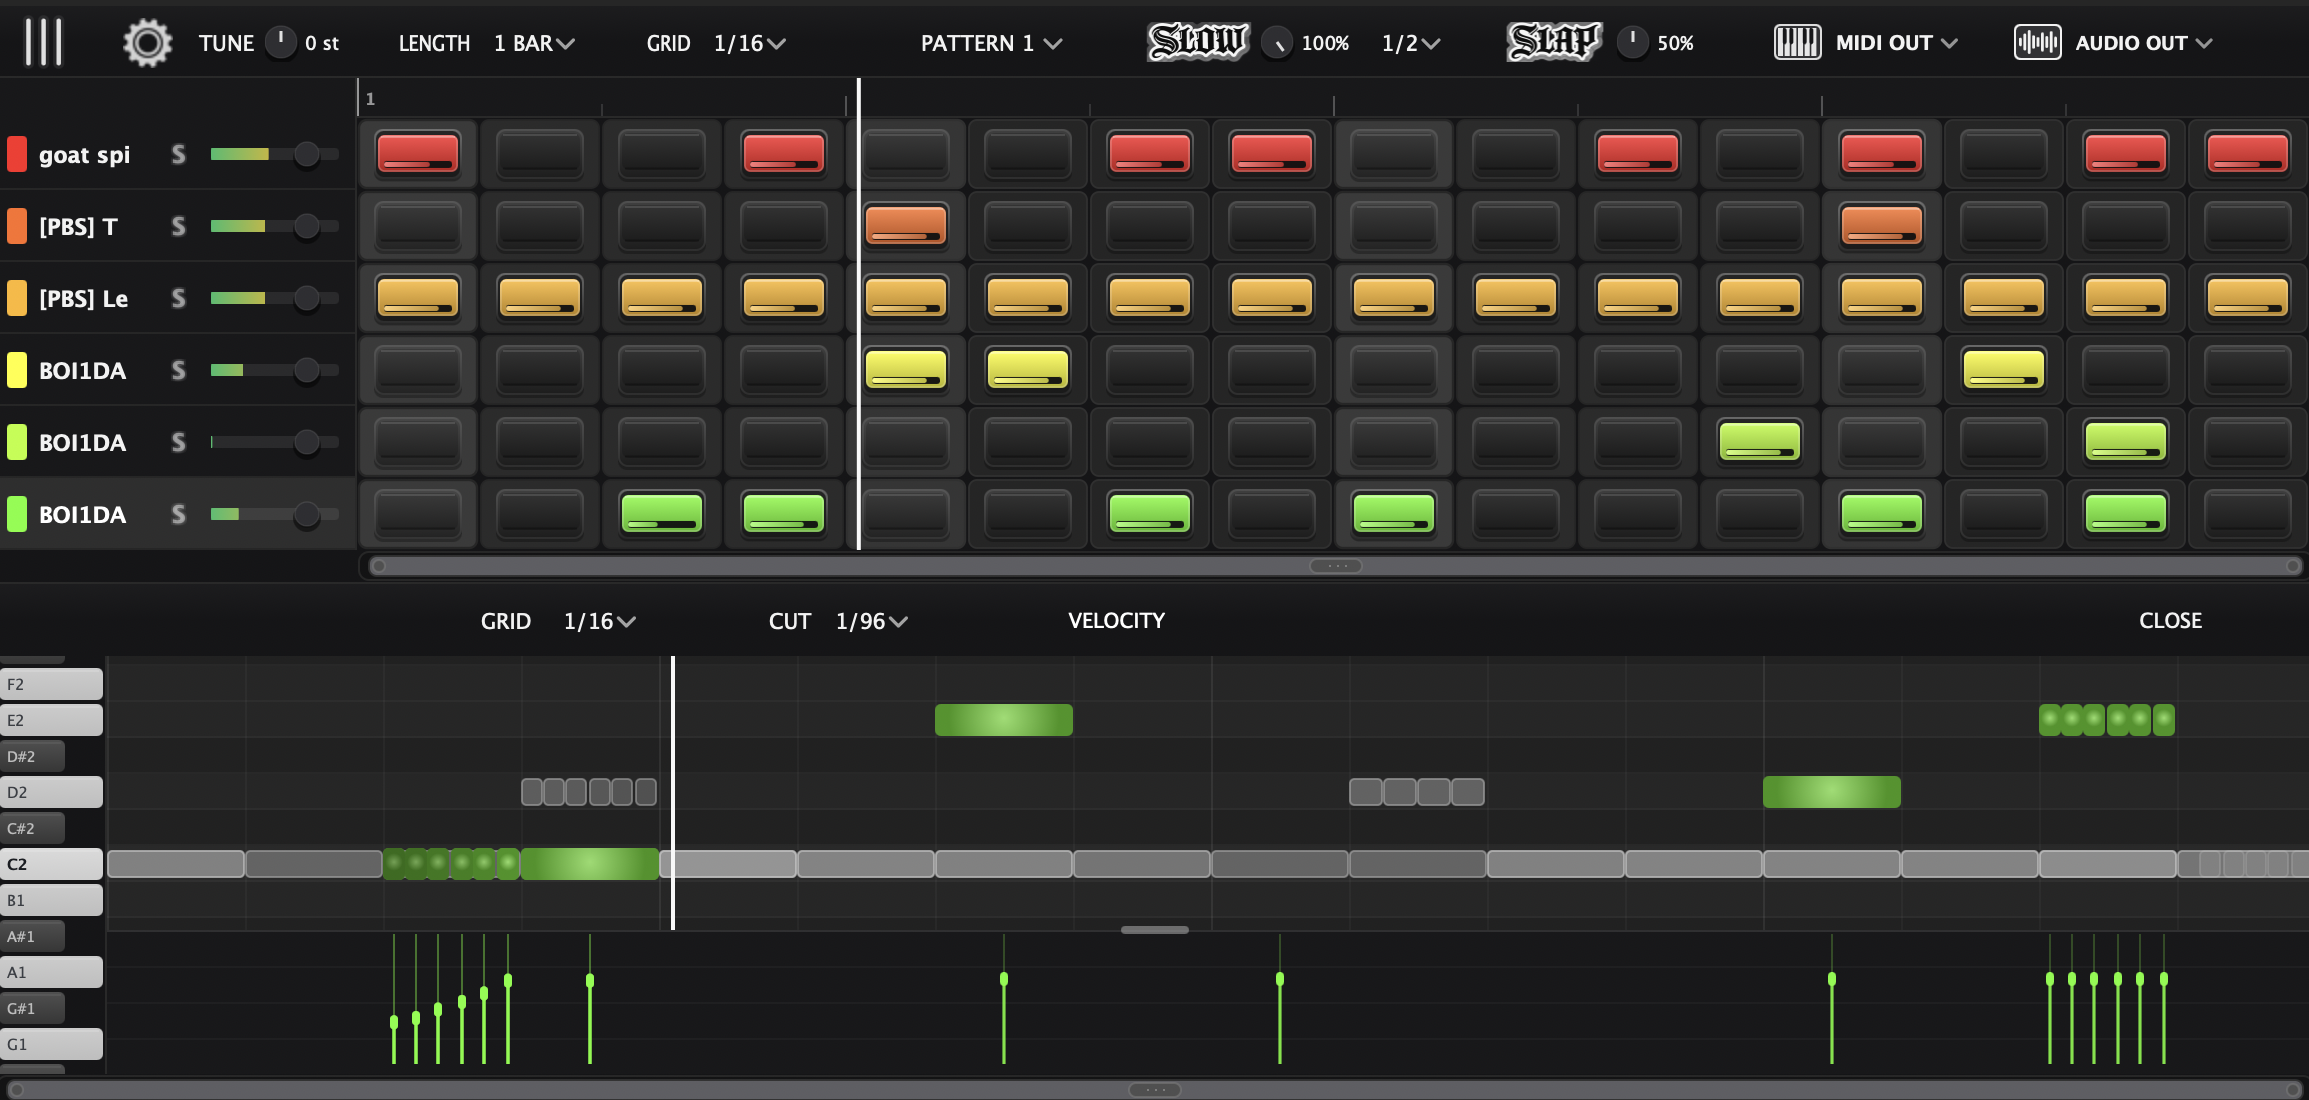
In TrapMan, load a kick, clap and closed hat into separate lanes. Start with a sparse pattern so you can hear whether the old snare still clashes. The trap drum patterns guide gives you a few starting grids.
Check the remaining bass before adding an 808. Drum removal doesn't necessarily remove the bassline. Keep that line, or separate it too and write a replacement; two unrelated low ends will fight. The kick, 808 and sub guide explains what each part needs to do.
Finish by muting your drums. The phrase should still be worth sampling. Bring them back: does the new rhythm actually suit it?