TrapMan User Manual
TrapMan is a drum sampler and sequencer built for trap and hip-hop production. One window holds your sample lanes, a step grid, a linked piano roll, a sample editor, a pattern arranger, kit and pattern presets, and drag-and-drop export into your DAW. This manual covers every feature, top to bottom.
01Activation & trial
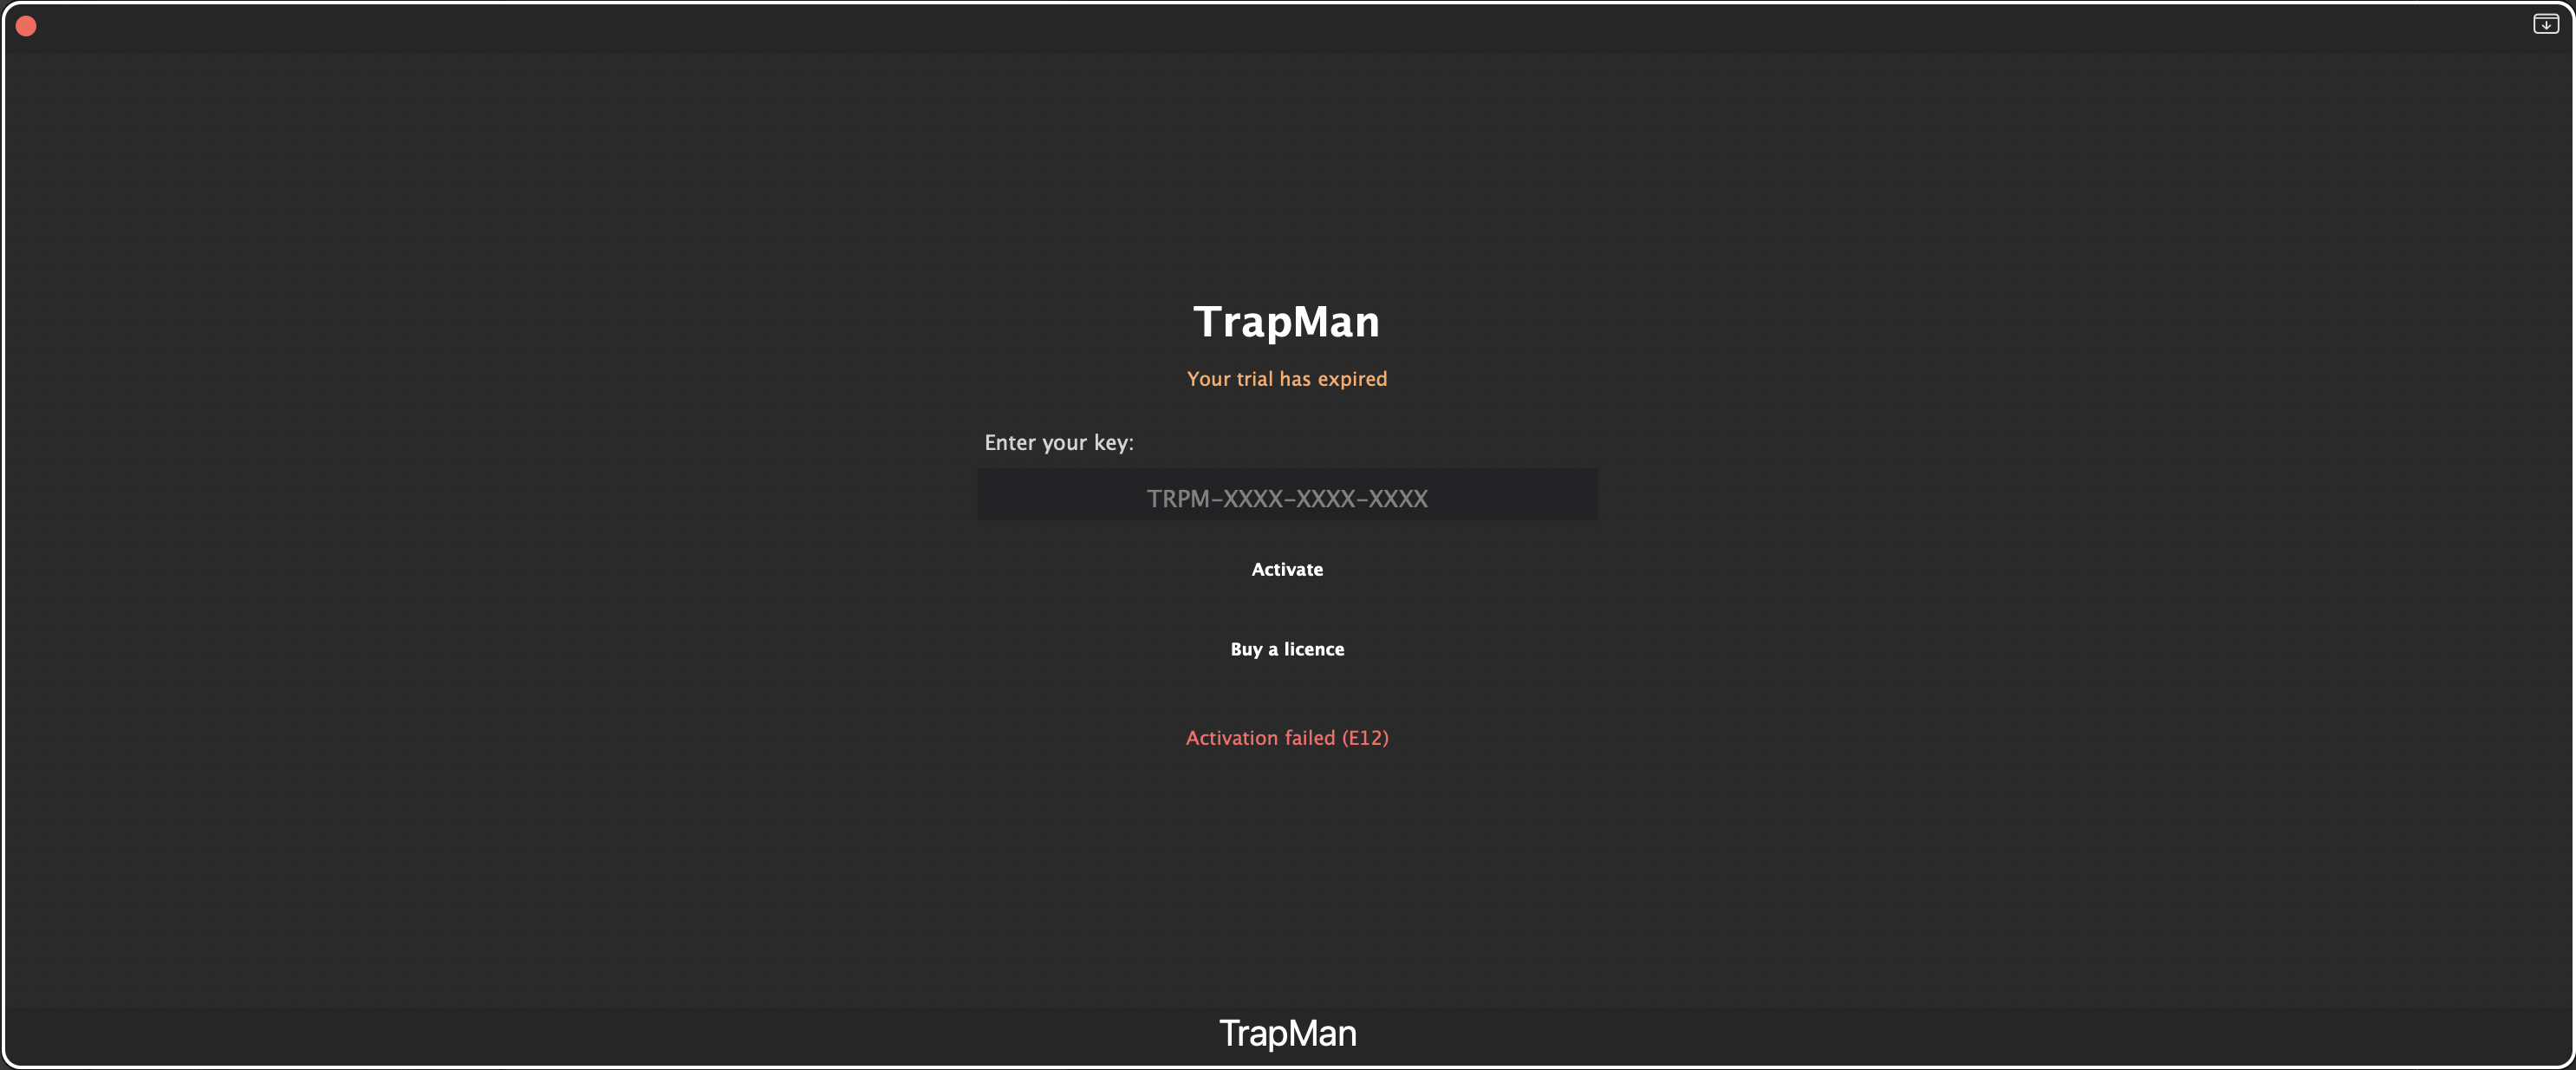
TrapMan loads as an instrument in your DAW: AU and VST3 on macOS 11+ (Apple Silicon and Intel), VST3 on Windows. Until a licence is active the plugin shows the licence screen and stays silent.
- Enter your key (
TRPM-XXXX-XXXX-XXXX) and hit Activate. - No key yet? Get free trial starts a 7-day trial. One machine per trial, two machines per paid licence.
- Once activated, TrapMan keeps working offline. Moving to a new computer? Preferences → About → Revoke licence for this computer, then activate on the new machine.
02Interface tour
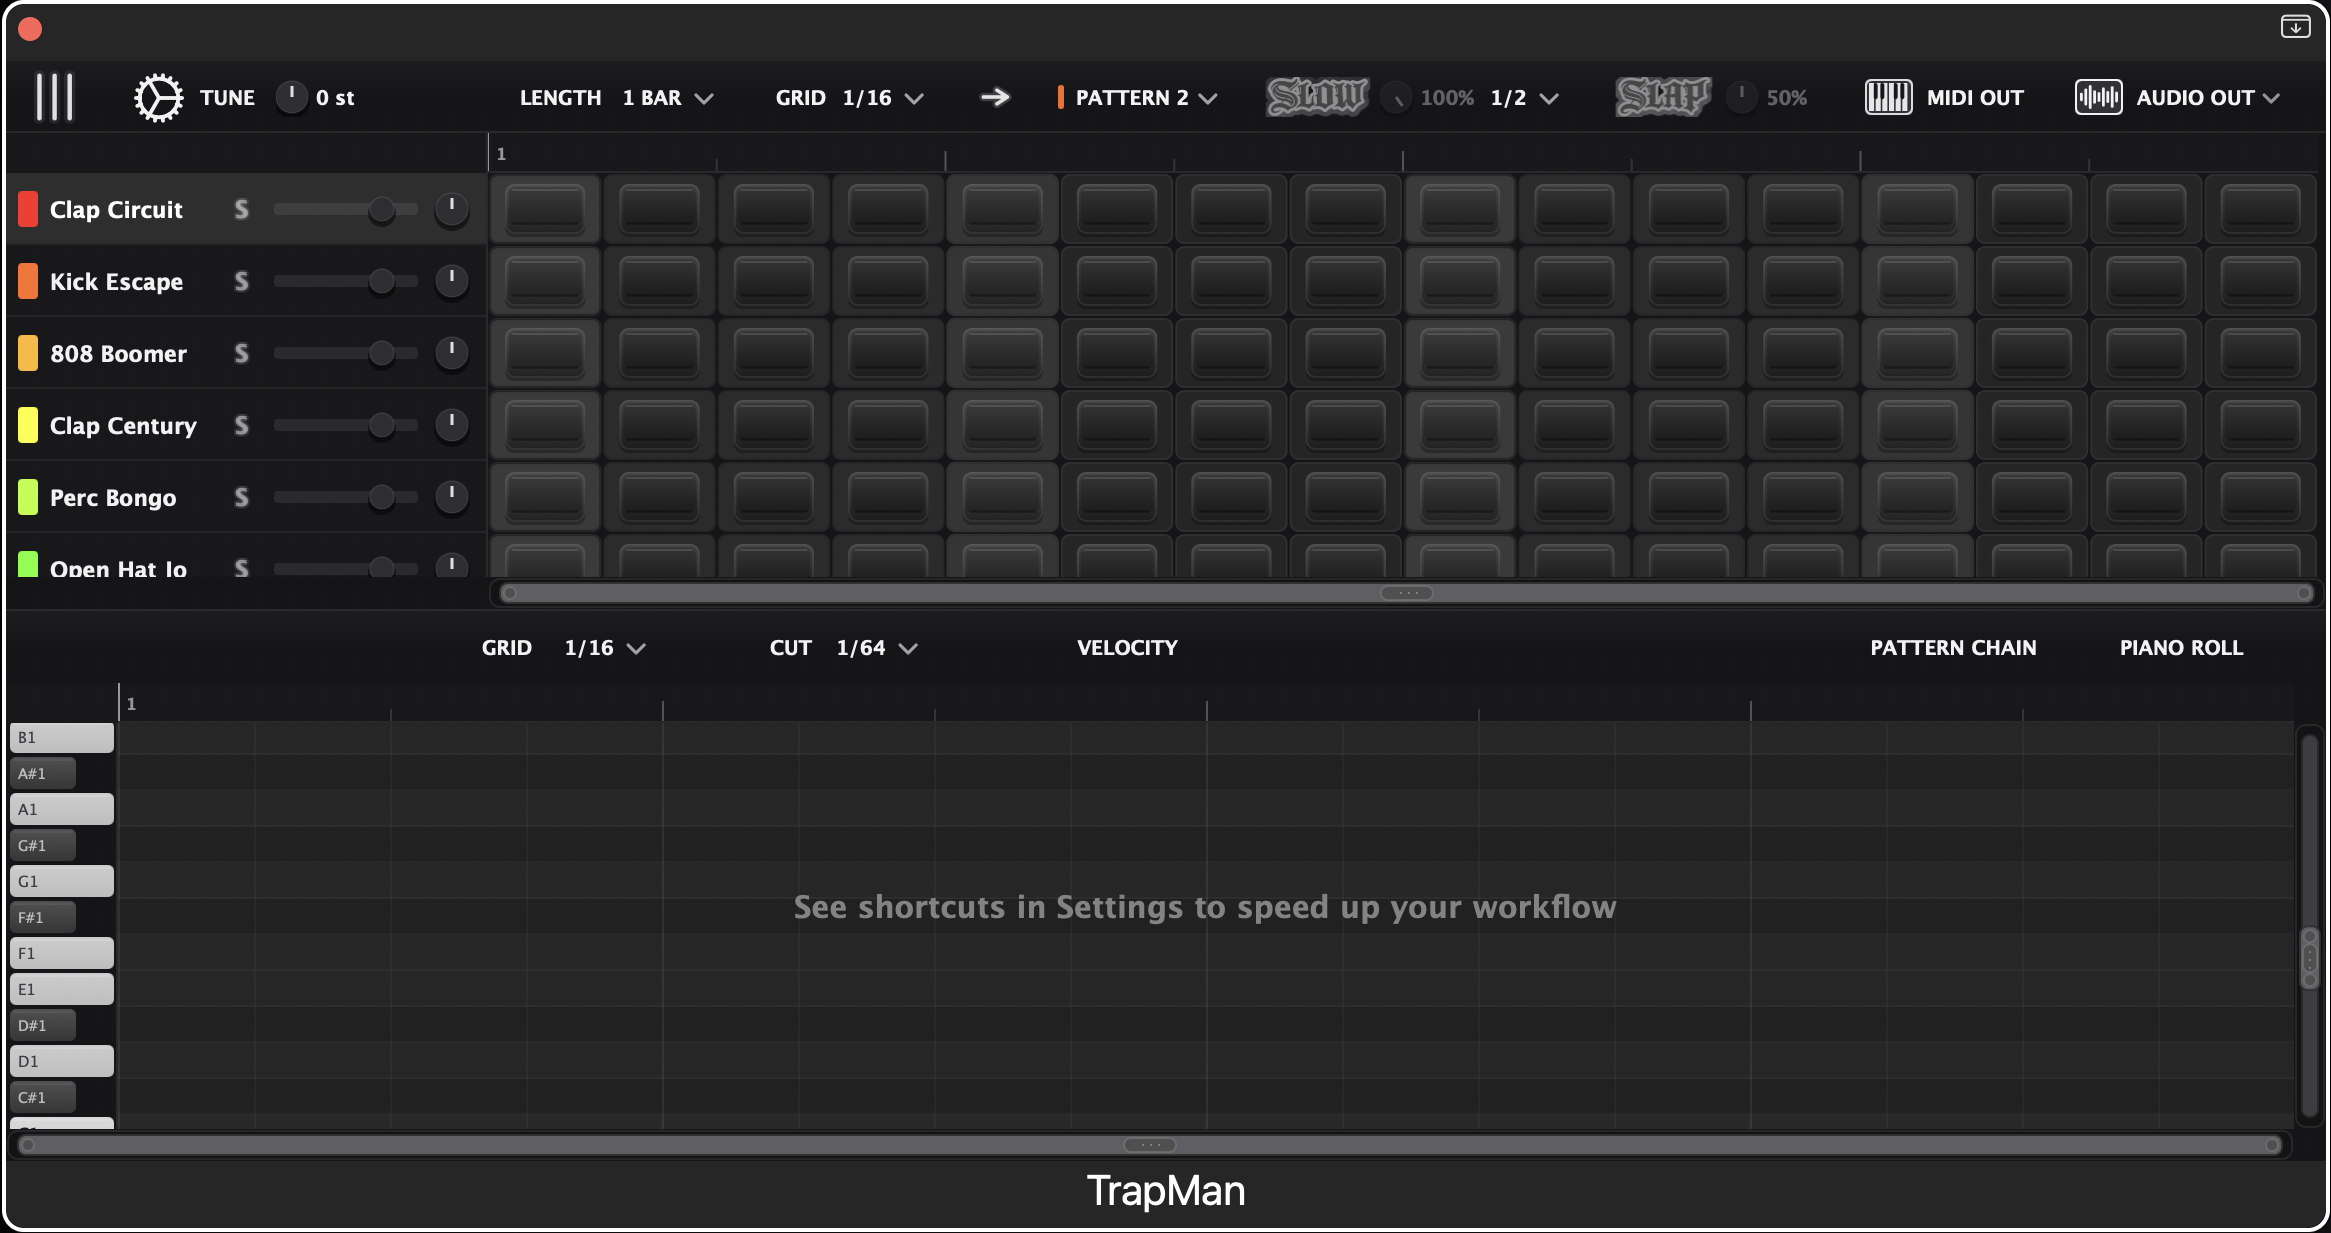
The window (resizable, default 1160 × 550) splits into seven zones:
- Preset bar: the KITS and PATTERNS slots and the BROWSE button, above everything else.
- Top bar: library toggle, preferences, Master Tune, pattern length & grid, pattern selector, Slow / Slap, MIDI OUT / AUDIO OUT.
- Library: a slide-in browser on the left.
- Lane panel: one row per sample: name, color, mute/solo, volume, pan, meter.
- Pattern grid: the step sequencer, aligned with the lanes.
- Bottom panel: the Piano Roll or the Pattern Chain (tabs on the right; clicking the active tab collapses the panel).
- Zoom bars: drag the ends to zoom, the middle to scroll.
Every divider between zones is draggable. Almost everything is undoable with ⌘Z / ⌘⇧Z, and the spacebar always drives your DAW's transport, never the plugin.
03The top bar

| Control | What it does |
|---|---|
| Library | Opens / closes the sample browser. |
| ⚙ | Opens Preferences (themes, UI zoom, MIDI octave, shortcut guide, licence). |
| TUNE | Master Tune, −12…+12 semitones. Retunes the whole kit to your song key. |
| LENGTH | Pattern length: 1, 2, 4, 8 or 16 bars. |
| GRID | Step resolution, 1/4 → 1/128 with triplets. |
| → | Follow mode: auto-scrolls the grid and piano roll with the playhead. |
| Pattern | Current pattern. Click for the pattern list, right-click for quick actions, drag it into the Pattern Chain. |
| Slow / Slap | The two bus effects. See section 12. |
| MIDI / AUDIO OUT | Drag straight into your DAW to export. See section 15. |
Knob gestures everywhere: drag vertically to set, ⌘-drag for fine control, right-click / ⌥-click / double-click to reset. Ctrl + scroll steps through the GRID and CUT menus without opening them.
04Presets: kits & patterns
A bar above the top bar holds two independent preset slots: KITS on the left, PATTERNS on the right. Recall a kit and every pattern stays exactly as you wrote it; recall a pattern and it lands on the kit you are already using. That independence is the point: run one beat through five kits, or five beats through one kit, without rebuilding anything.

What each kind stores
- Kit presets carry every lane: the samples themselves (embedded, so a kit survives its source files being moved or renamed and travels to another machine intact), plus each lane's editor settings, color, volume, pan and output.
- Pattern presets carry all 24 pattern slots, the Pattern Chain and the master FX. Slow is per pattern, so its rate and mix travel with it: a recalled beat comes back at the depth you saved it, never switched on at the wrong setting.
- Recalling patterns written for a bigger kit grows the lane count instead of dropping notes. The extra lanes arrive empty, waiting for samples.
- One ⌘Z undoes a whole recall.
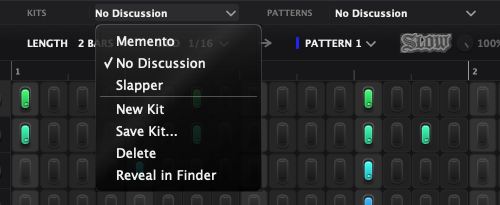
Click a slot for its menu: your saved presets at the top, then New Kit or New Pattern, Save Kit… or Save Pattern…, Delete and Reveal in Finder. New Kit puts every lane back to its defaults with no samples; New Pattern leaves a single empty pattern and clears the chain with it. Each clears only its own half, and one ⌘Z brings your work back, so neither asks for confirmation.
Presets live in ~/Documents/TrapMan/Kits and ~/Documents/TrapMan/Patterns. The files are encrypted: the audio travels inside a kit, but it cannot be pulled back out of the file.
Three kits to start from
Slapper, No Discussion and Memento install with the plugin, each with its own pattern, all built from the Core Kit. They land in your preset folders on first launch and behave like your own presets from then on: edit them, rename them, delete them. A later update only hands you kits you have not had yet, and never replaces one you changed or a name you are already using.
Sharing and importing
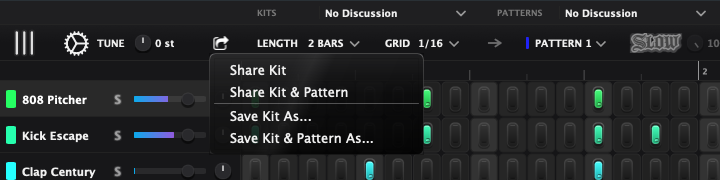
The share button left of LENGTH sends what you are working on, no saving required. Share Kit sends one self-contained file. The samples are embedded, so it plays on a machine that has never seen your library. Share Kit & Pattern sends both. Save As… writes the same files wherever you point them, so a kit can go straight into a pack folder. Every browser row has the same share mark on its right.
To bring presets in, drop a .tmkit or .tmpat anywhere on the plugin (the window lights up to show it will take it) or use IMPORT in the browser. IMPORT also accepts folders, so a pack sorted into Kits/ and Patterns/ arrives in one go, and the footer reports what landed and what was skipped. An imported preset is copied in and shown selected; loading it stays your decision.
The browser
BROWSE opens both libraries side by side, kits left and patterns right. Each column lists Name, Added and a five-star Rating. Click a header to sort by it, click a star to rate. Ratings live in your settings, not inside the preset files, so rating a kit never rewrites it.
The pattern side also shows BPM, the tempo the pattern was written at, stored in the file itself. Right-click a preset to duplicate, delete or give it a colour tag; tags and ratings live in your settings, so they are your filing and never travel to whoever you send the preset to.
The chain glyph between the two NAME headings links the columns. Linked, which is how it starts, a kit and a pattern saved under the same name sit on the same row, scrolling one scrolls the other, and picking one moves the other side's selection with it. Linking forces a sort by name, since that is the only order in which the same name can line up on both sides; unlink and each column goes back to the sort it had.
Selecting a preset auditions the combination that recalling it would give you, not the preset in isolation: highlight a kit and you hear your current beat through that kit; highlight a pattern and you hear that beat on your current kit. The audition is played by the engine itself, in step with your DAW, so it stays in sync at any tempo and follows a tempo change as it happens. The speaker at the bottom left mutes it and the slider beside it sets its level.
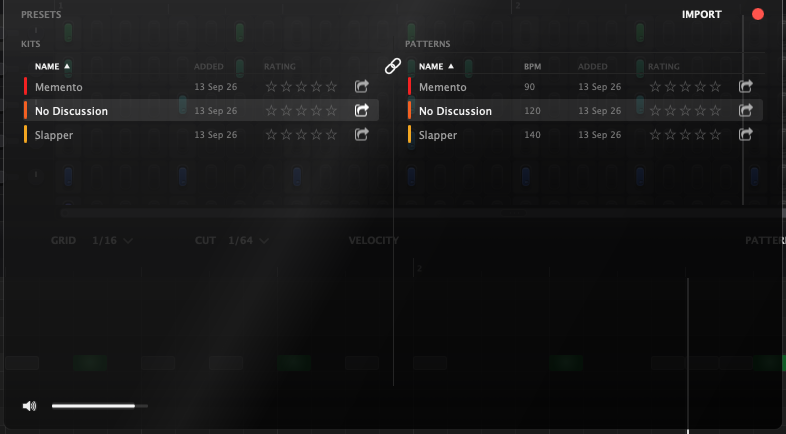
Saving works from either end. The floppy left of BROWSE saves the kit and the current pattern under one name, which is also what pairs them in the linked columns. Saving over a name that already exists asks first, rather than quietly writing a second copy beside it.
05Lanes
Each lane holds one sample (WAV, AIF/AIFF, MP3, FLAC), up to 16 lanes per project.
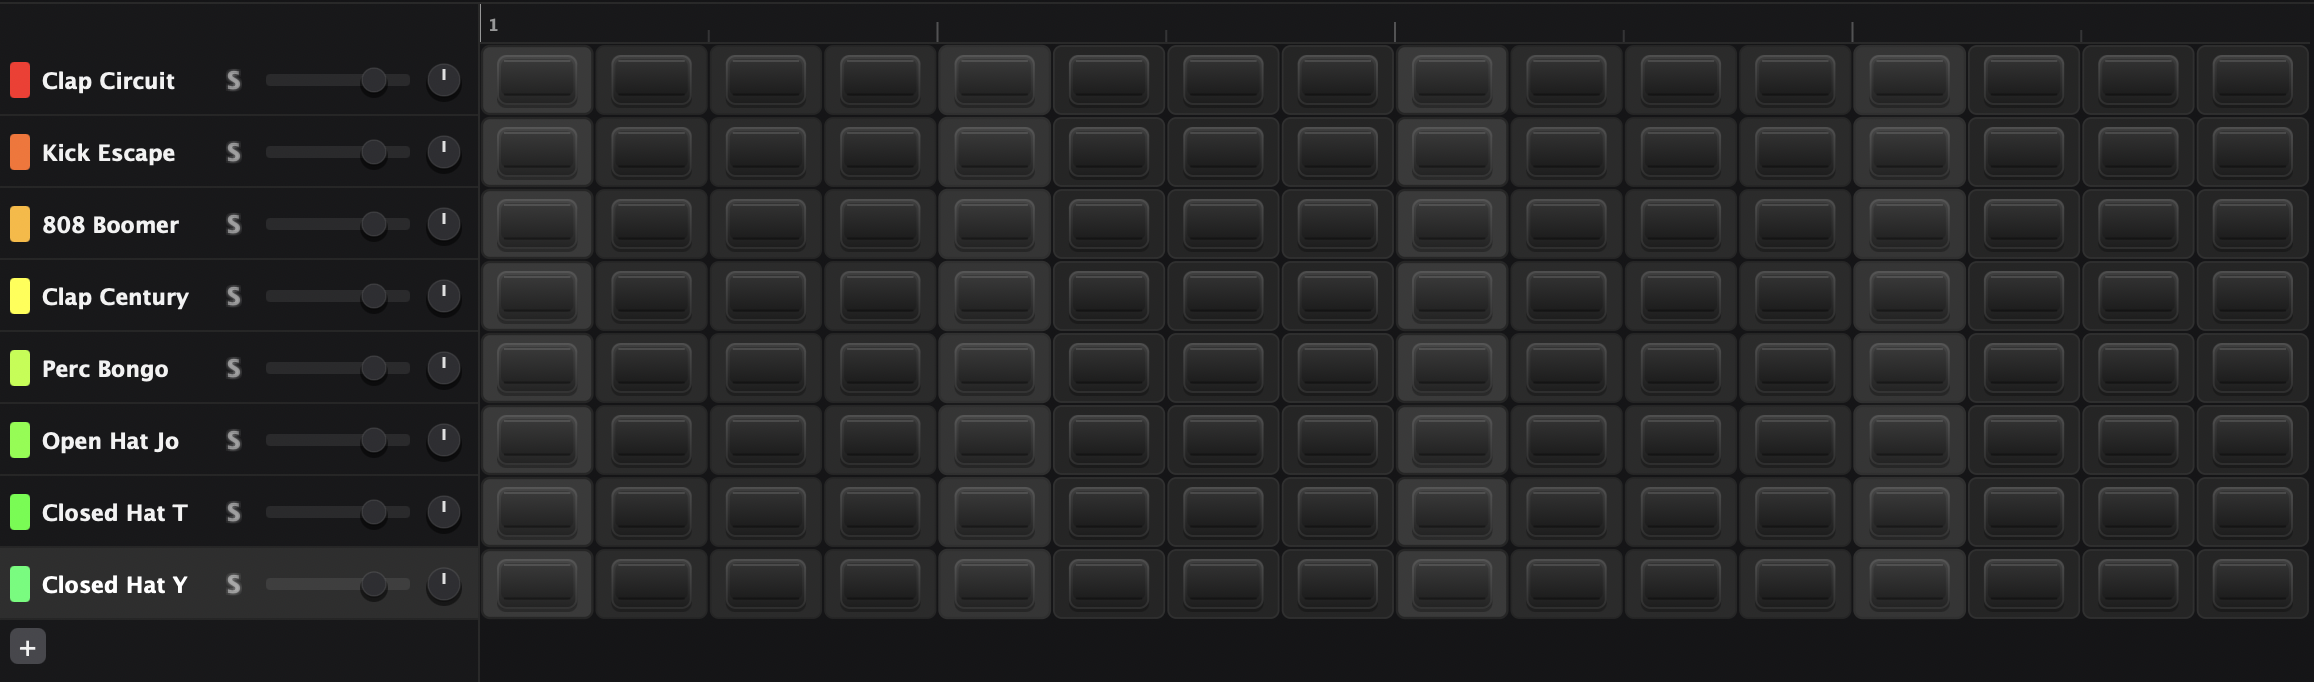
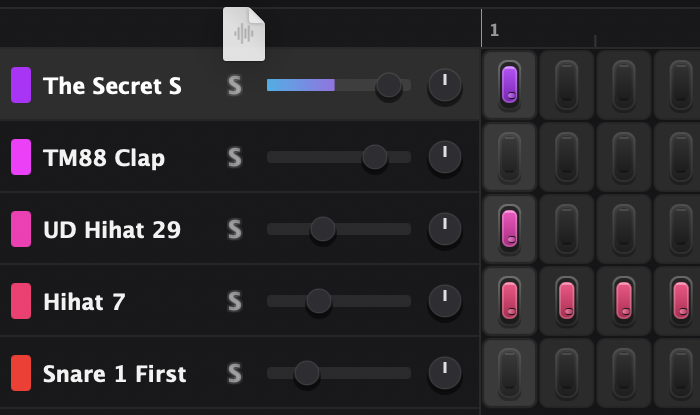
- Color chip = mute toggle. S = solo. Click the name to preview the sample.
- Volume fader (−∞ to +6 dB) with built-in meter and a clip light; click the light to clear it. Pan knob with a center detent. ⌥-click either to reset; with several lanes selected, both move as a group.
- Reorder by dragging a row; hold ⌥ to duplicate instead (⌘D works too; the copy carries the sample, settings and notes in every pattern).
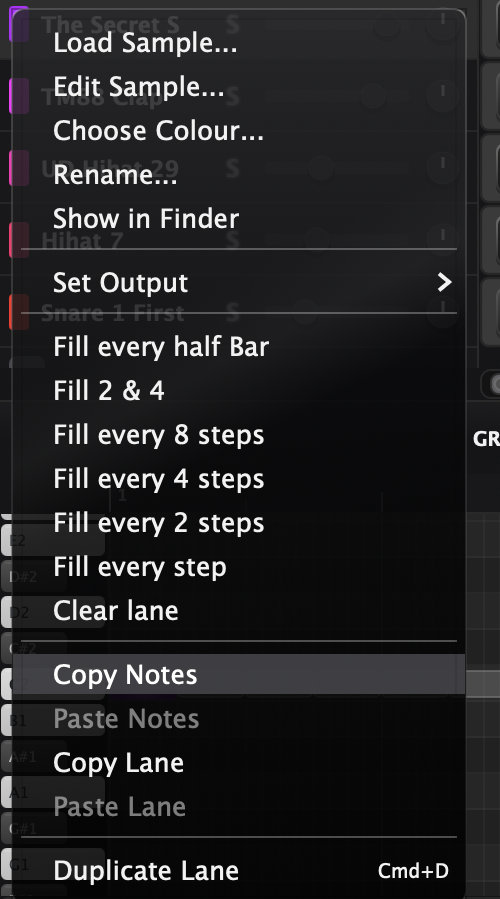
- Load samples by dropping files on a lane (replaces its sample) or below the lanes (creates new ones), by double-clicking in the Library, or via right-click → Load Sample….
- Fills: numpad 1–6 on the selected lane write instant patterns: every step, every 2/4/8 steps, a 2-&-4 backbeat, or every half bar.
- Clear steps: right-click → Clear steps wipes the lane's notes in the pattern on screen and keeps the sound. Clear lane is still the bigger hammer: it drops the sample and its editor settings too.
- Mute or solo several lanes at once: press on a colour chip or an S and drag up or down: every lane you cross takes the state the first one just took, so a run of lanes mutes in one gesture instead of flip-flopping.
- Copy & paste: right-click a lane for Copy Notes / Paste Notes (just the notes in the current pattern) or Copy Lane / Paste Lane (sample, settings and notes in one go). Both work between lanes and between TrapMan instances, so a lane can move to another project.
- Drag a sample out: grab a lane by its name and drag it into your DAW or the Finder to drop the audio file itself. A click still previews; the drag only starts once you move.
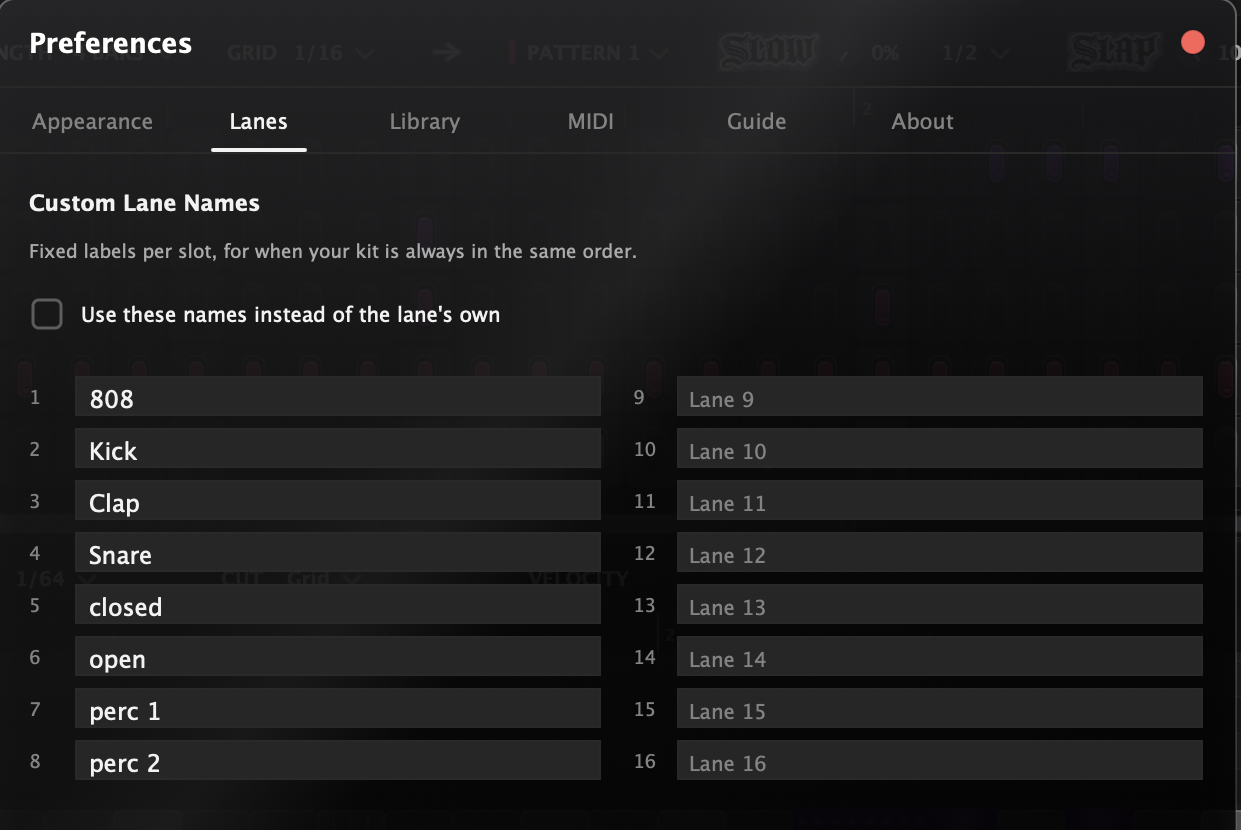
- Fixed lane names: Preferences → Lanes labels the 16 slots once (808, Kick, Clap…) for a kit that is always in the same order. Tick Use these names instead of the lane's own to switch it on. It is a display override, so switching it off brings each project's real names straight back.
- A red name means the file went missing. Click it to relocate, or right-click → Locate All Missing to fix every lane from one folder scan. Saved projects embed a copy of each sample, so recent projects keep playing regardless.
06Library & Smart Folders
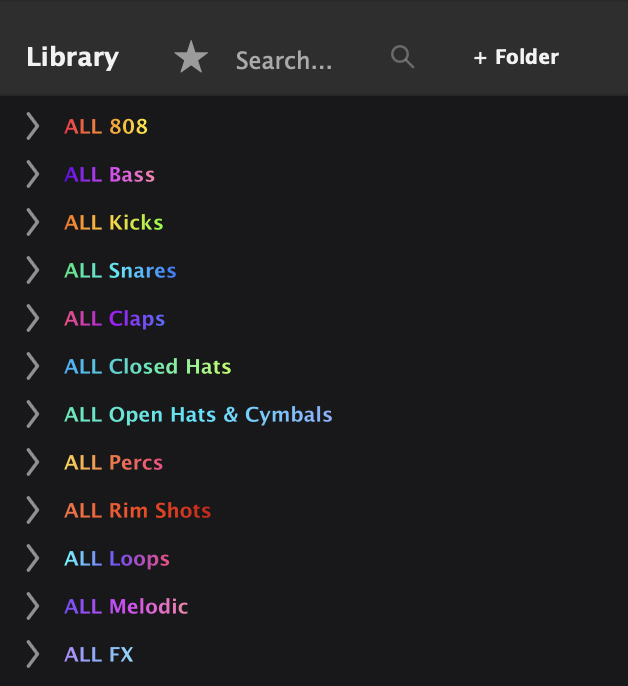
Add your sample folders with + Folder (or drop them straight into the drawer). One click previews a sound. The preview runs through the active Slow/Slap chain, so you hear it in context. Double-click loads it into the selected lane.
- Search filters as you type across every folder.
- Favorites (right-click) plus a star filter in the header.
- Colors tag folders and files for quick scanning.
- Return acts on the selection: it opens a folder, or loads the highlighted sample onto the selected lane, digging without leaving the keyboard.
- Folders list alphabetically, and the speaker in the footer mutes previewing when you want to audition nothing.
Smart Folders classify your whole library automatically (filename analysis first, then a neural network on the audio itself) into 12 categories: 808s, Bass, Kicks, Snares, Claps, Closed Hats, Open Hats & Cymbals, Percs, Rim Shots, Loops, Melodic, FX. Opening one lists its sounds in random order, built for digging. Each smart folder keeps one shuffle for the life of the instance, so collapsing and reopening it does not reshuffle the sounds out from under you. Re-run the analysis anytime with Preferences → Library → Rescan Library.
07Sample editor
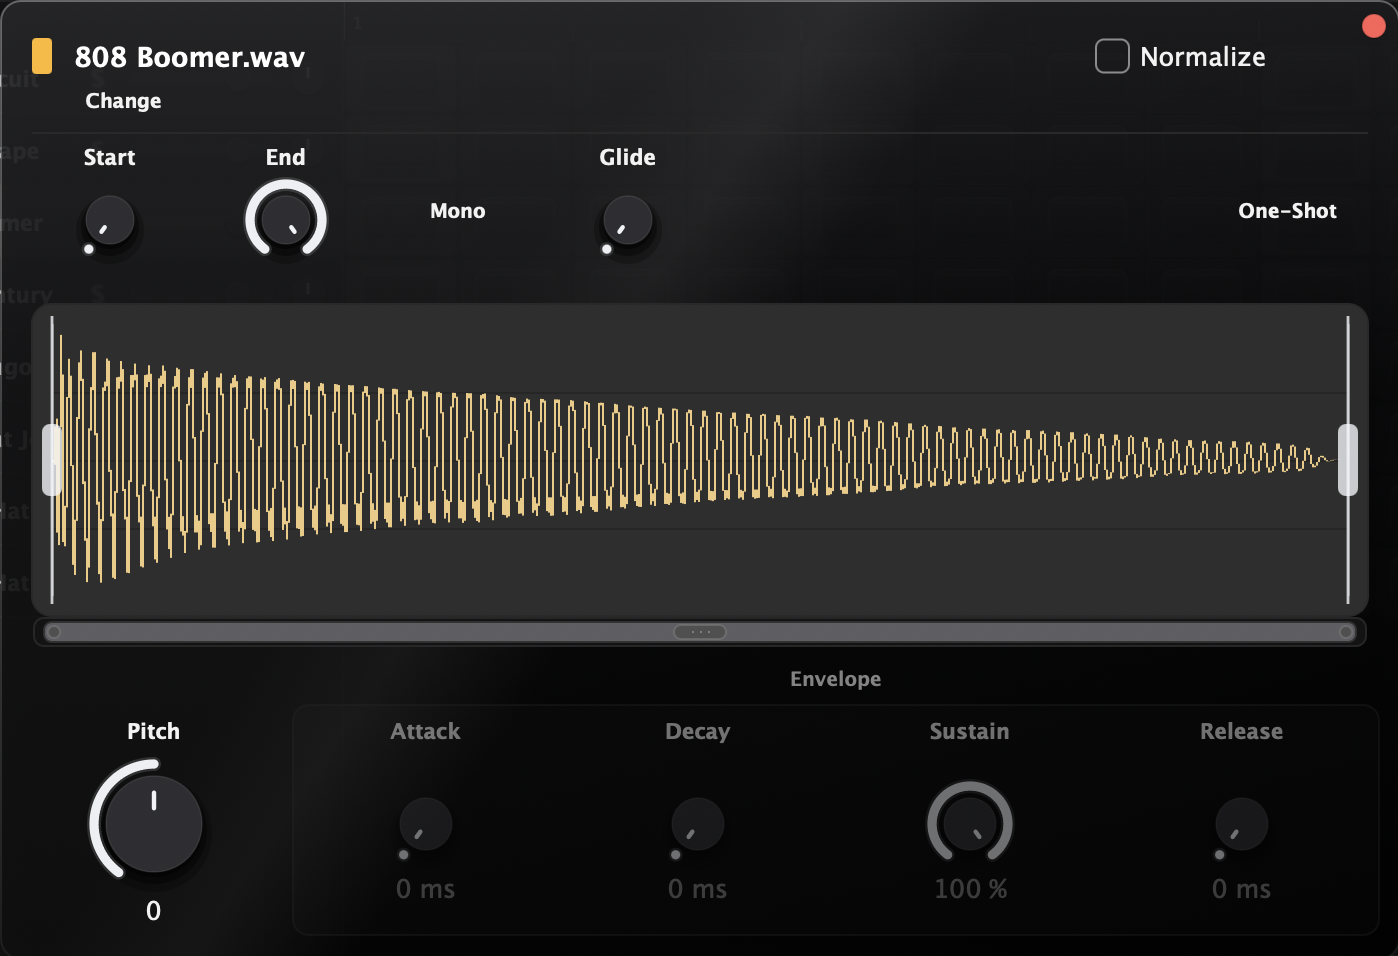
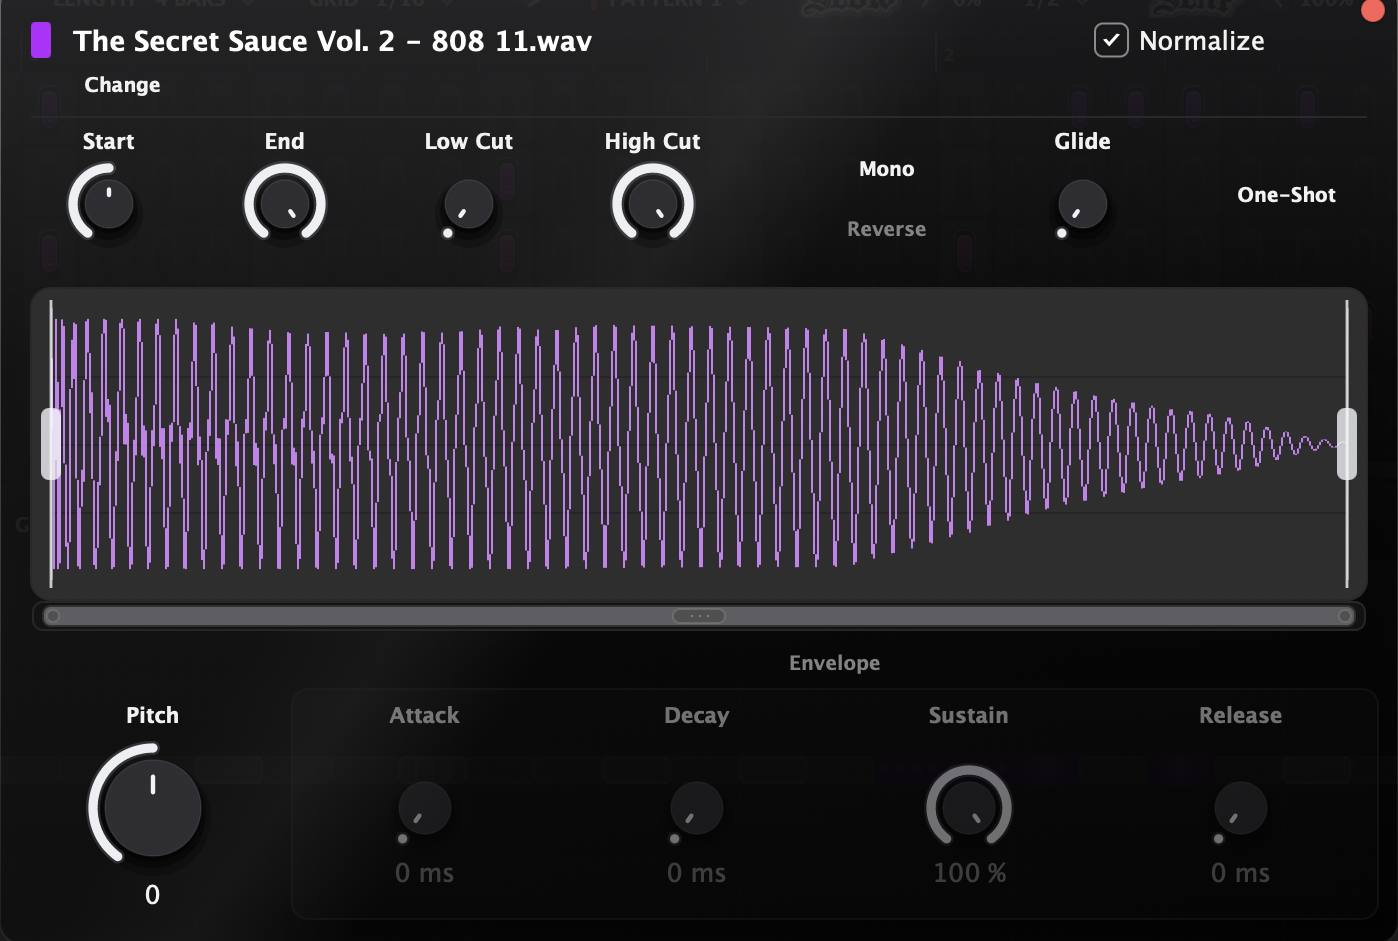
Right-click a lane → Edit Sample…. The waveform shows the sound exactly as it will play; drag the triangular handles for fade-in/out, pinch to zoom, click to preview, or drop a new file on it to swap the sample.
| Control | Range | Notes |
|---|---|---|
| Start / End | trim range | Turn Start below zero for up to 200 ms of pre-roll silence, to sit an 808 behind the beat. The knob is skewed so zero still points straight up. |
| Pitch | ±24 st | Snaps to semitones; hold Ctrl for cents. |
| Attack / Decay / Sustain / Release | 0–500 / 0–1000 ms / 0–100 % / 0–1000 ms | Active when Envelope is on. |
| Low Cut / High Cut | 20 Hz – 20 kHz | Per-lane filters; at the extremes they're off. |
| Gain | ±24 dB | Trims the sample's own level, baked in with the trim, reverse and filters. The lane fader stays your mix control. Greys out while Normalize is on, which reports how much it is lifting instead. |
| Glide | 0–1000 ms | Requires Mono. Used by 808 slides. |
Toggles: Mono (a new hit cuts the previous one; default, the classic 808 / hat behavior), One-Shot (sample rings out regardless of note length; turn off to gate it to the note), Envelope, Normalize, and Reverse, which plays the sample backwards and mirrors the display with it, so the waveform, its trim shading, the fade handles and the zoom bar all match what you now hear. ⌥-click any knob to reset it.
08Pattern grid
- Click an empty cell to add a step; keep dragging to paint. Right-click erases the same way, so fast passes never skip cells.
- ⌘-drag up/down on a step sets its velocity (⇧ for fine). ⌥-click resets it to 100.
- ⇧-click / ⇧-drag selects; drag a selected step to move everything; hold ⌥ to drop a copy. ⌘A selects the pattern.
- ⌘C / ⌘V copy & paste. While stopped, click the ruler to place the paste cursor. ⌘R replicates the selection right after itself and grows the pattern automatically (1 → 2 → 4 → 8 → 16 bars) when it overflows.
- ⌥U splits every event in the pattern at the current grid.
09Piano roll
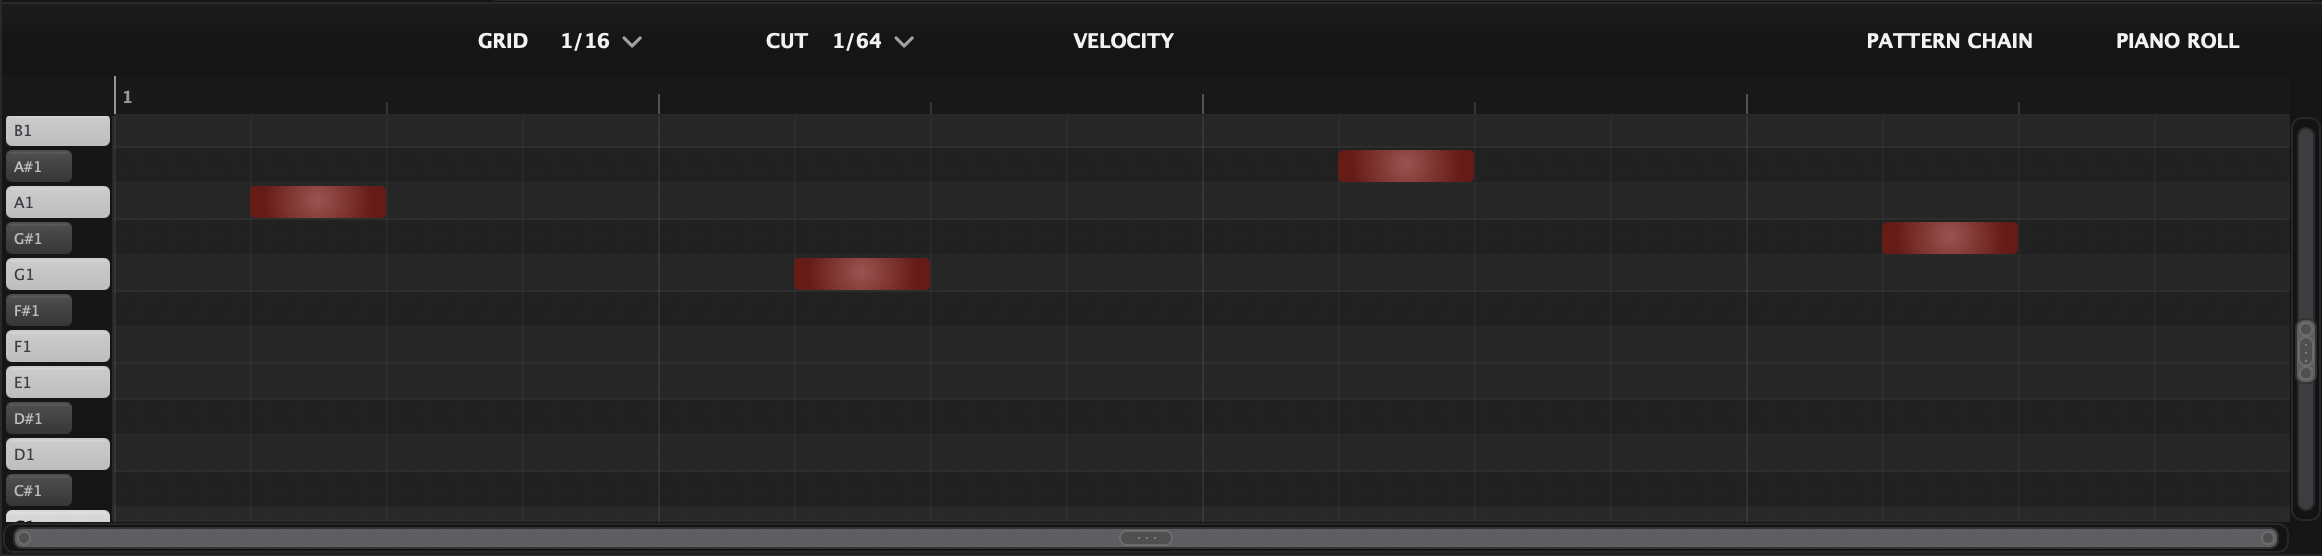
The piano roll edits the selected lane melodically; other lanes show as gray ghosts. Notes snap softly: within 8 px of a grid line they lock on, otherwise they land free. Hold ⌘ while dragging for fully free placement, drag a note's edge to resize, and use the left keyboard to audition pitches.
- Velocity lane (the VELOCITY button): draw absolute values with no selection, or drag a selection to offset it while keeping its shape. ⌥-click resets to 100.
- Hat rolls: select notes, ⌘U subdivides them at the CUT resolution. ⌘⇧U does the same but walks each slice down a semitone, an instant descending roll.
- 808 slides: select a note and press S. A slide note re-attacks the sample but its pitch glides in from the previous note; glide time is the note's own length. Slides need the lane's Mono mode (on by default).
- Transpose / nudge: ↑↓ semitone, ⇧↑⇧↓ octave, ←→ grid step, ⇧←⇧→ a bar.
- The number row sets the piano-roll grid on the fly; ⌥ + scroll zooms vertically, ⌥⌘ + scroll horizontally.
10Patterns
A project holds up to 24 patterns, each with its own length, color, name, and its own Slow state. Click the pattern selector for the list: click to switch, drag the grip to reorder, trash to delete, right-click to recolor. Right-click the selector itself for New, Rename (emoji supported 🔥), Color and Duplicate. The gray EMPTY pattern is a ready-made silence, handy as a breakdown block in the chain.
Scroll over the pattern selector to step through your patterns without opening the list, the quickest way to A/B two versions of a beat while the track plays.
11Pattern Chain
The chain turns patterns into an arrangement that follows your DAW's timeline. As soon as it holds one block, the chain drives playback: bar 1 of the song is bar 1 of the chain, and past its end TrapMan goes silent. Empty chain = the current pattern loops.
- Press P to push the current pattern onto the chain, drag the pattern name from the top bar into it, or use the + button.
- Click a block's title to swap its pattern; drag to reorder; ⌥-drag to copy; drag the right edge to resize (⇧ for quarter-bar precision). A block longer than its pattern loops it.
- ⌘ + right-click is the split tool; double-click renames the block's pattern.
- Select a run: ⇧-click a second block to take everything between the two, or ⇧←/→ to grow the selection a block at a time. The run then moves, copies, deletes, duplicates and repoints as one, in a single undo step.
- Copy and paste blocks with ⌘C / ⌘V. Each paste lands after the selection and becomes the new selection, so repeated pastes lay copies end to end.
- Duplicate as New (right-click, ⌘⇧D) clones the block's pattern into a free slot instead of sharing it, and opens the name box on the copy, the way to turn a section into a variation without touching the original.
- Blocks cut sample tails cleanly at their boundaries, so an 808 never bleeds into the next section.
Preferences → Sync draws your DAW's cycle range across the chain's ruler, so the loop you set in the host is visible against the arrangement. It is off until you switch it on.

12Slow, Slap & Master Tune
Slow is the chopped-&-screwed switch: tempo-synced half-speed playback, one octave down. It's per pattern, so flip it on your drop pattern only. The rate menu (1/16 → 4 bars) sets the slice length: short = tight stutter, long = big slowed waves. The % knob blends dry/wet.
Slap glues the bus with one knob: a compressor tuned for drums (its detector ignores everything under 120 Hz, so 808 subs never pump it) into soft saturation and a clipper. Push the % until it knocks.
Master Tune (±12 st) retunes the entire kit at once. All three, plus each lane's volume, pan, mute and solo, are automatable from the DAW.
13Playback & DAW sync
- TrapMan follows the host transport: tempo, position, loop. There is no internal play button.
- Hit play on any bar and the pattern starts on its own beat 1; loops wrap sample-accurately, with no flam on the downbeat.
- Return restarts the pattern from the top without touching the DAW transport, perfect for re-cueing while you jam.
- On stop, ringing one-shots (808 tails, cymbals) decay naturally.
- Playback follow: the arrow button above the grid scrolls the view with the playhead. It starts off, so the grid stays where you put it while you edit.
- The window and the layout come back as you left them: size, library drawer, the split between lanes and grid, the piano-roll height and which view sits in the bottom panel are all saved with the project.
14MIDI in & import
Play the kit: incoming MIDI triggers lanes chromatically from C1: lane 1 = C1, lane 2 = C♯1, and so on (change the octave in Preferences → MIDI). The incoming note picks the lane; each pad plays its sample as tuned in the editor.
Import: drop a .mid file onto a lane row to replace that lane's notes in the current pattern, pitches and velocities preserved, pattern length grows automatically. One ⌘Z undoes it.
15Export
Select lanes, then drag a badge from the top bar into your DAW:
- MIDI OUT: one
.midper selected lane (current pattern, real pitches and velocities, tempo embedded), numbered to keep lane order. - AUDIO OUT: renders the current pattern with Slow, Slap and Master Tune baked in, as 24-bit WAV. Click the badge to pick Single File (everything summed) or Multiple Files (one stem per lane).
The audio render stops exactly at the pattern's end, so bump LENGTH up one size if your 808 tail needs room. Muted lanes are skipped; use the lane selection (not solo) to choose what gets exported.
16Multi-out
TrapMan exposes 16 stereo outputs (Main + Out 1–15). Enable them in your DAW, then right-click a lane → Set Output, or flip Route All Lanes Incrementally to spread every lane onto its own output in one click. Lanes aimed at an output the DAW hasn't enabled fall back to Main, so nothing goes missing.
17Keyboard shortcuts
macOS shown; on Windows use Ctrl for ⌘ and Alt for ⌥. The full list also lives in Preferences → Shortcuts, where each one can be switched off with the tick box beside it. A shortcut you turn off is handed back to your DAW instead of being swallowed, which is what you want when a host wants that key for itself.
| Keys | Action |
|---|---|
| ⌘Z / ⌘⇧Z | Undo / redo, everywhere |
| ⌘A · ⌘C · ⌘V | Select all · copy · paste |
| ⌘R | Replicate selection after itself |
| ⌘U / ⌘⇧U | Cut notes / cut into a descending roll |
| S | Toggle slide on selected notes |
| P | Push current pattern onto the chain |
| Return | Restart the pattern |
| ⌘D | Duplicate the selected lane, or the selected chain block |
| ⌘⇧D | Duplicate a chain block as a new pattern |
| ⇧+click · ⇧←→ | Select a run of chain blocks |
| Tab | Switch the bottom panel: Piano Roll ↔ Pattern Chain |
| Numpad 1–6 | Lane fills (steps, 2/4/8, backbeat, half-bar) |
| ↑↓←→ (+⇧) | Nudge notes by semitone/step (octave/bar) |
| Number row | Set the piano-roll grid |
| ⌥+scroll / ⌥⌘+scroll | Zoom vertical / horizontal |
| Delete | Delete selected notes or steps |
18Specs
| Spec | Value |
|---|---|
| Lanes | 16 (5 on a new instance) |
| Patterns | 24, each 1–16 bars |
| Chain blocks | 64, min ¼ bar each |
| Grid | 1/4 → 1/128, triplets included |
| Polyphony | 64 voices per output |
| Sample formats | WAV · AIF/AIFF · MP3 · FLAC |
| Pitch | ±24 st per lane · ±12 st master |
| Outputs | 16 stereo (Main + Out 1–15) |
| Audio export | 24-bit WAV, single file or stems |
| Project files | Samples embedded, so sessions stay portable |